Ultimate Piwik Pro Consent Manager Guide
Consent management is a major topic in the digital analytics space. The focus on privacy is only going to increase as we transition from the days of the wild west to the internet.
Google’s consent mode is now required to use Google Ads (Google Analytics may be next on the list, who knows!), Other vendors like Piwik Pro have their own approach to privacy, which we will explore In this article.
Why You Need A Consent Manager?
Section titled “Why You Need A Consent Manager?”A consent manager is a vital part of the data tracking process. Without it, you can not manage consent preferences on your website.
From a tracking perspective, a consent management platform (CMP) has three main roles: manager users consent preferences, establish a record of consent, and send signal to control tags behavior.
Manage consent preferences
Section titled “Manage consent preferences”This is the main role of a CMP. A cookie banner is necessary to allow the user to control what we can collect.
Store Consent choices
Section titled “Store Consent choices”Having a record of your user’s consent choices is necessary to protect your company in case of a regulatory audit.
Send signals to control tags
Section titled “Send signals to control tags”Let’s say a user opts-out of tracking. The CMP will send a signal to the tag manager to stop certain tags from working or limit what information they can collect in case of advanced consent mode, for example.
What is Piwik Consent Manager?
Section titled “What is Piwik Consent Manager?”A lot of people recognize Piwik pro as an analytics tool, but it’s more of a combination of multiple solutions: tag management, analytics, and consent management.
This means that you can manage consent settings directly via Piwik’s interface.
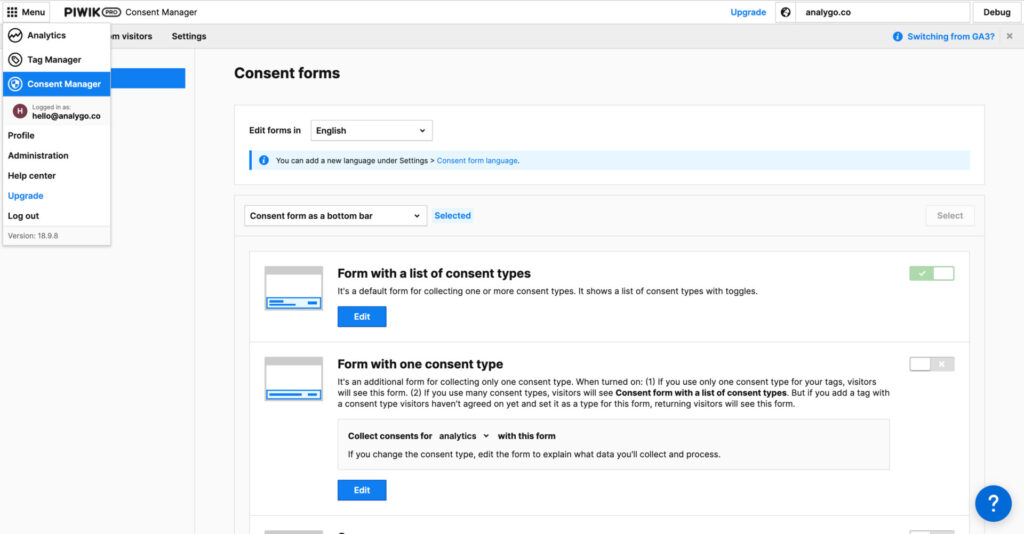
Access Consent Manager in Piwik Pro
Go to Menu > Consent Manager
How To Configure Piwik Pro Consent Manager
Section titled “How To Configure Piwik Pro Consent Manager”Configuring the consent manager is pretty straight forward if you already have a running Piwik Pro account.
We are assuming you already configured Piwik pro, if it’s not the case, please follow the steps in this tutorial and come back to this guide after you are done.
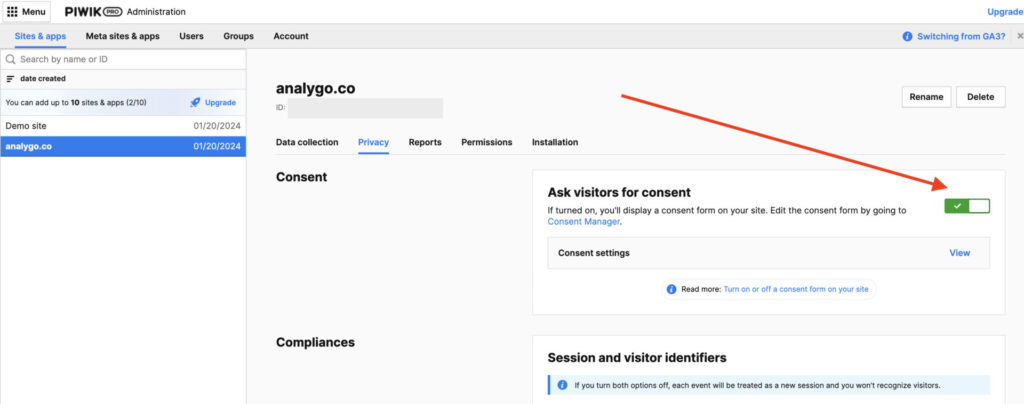
Browse to Menu > Administration > Select your website > Privacy. check the “Ask visitors for consent” option.
Customize your pop-up
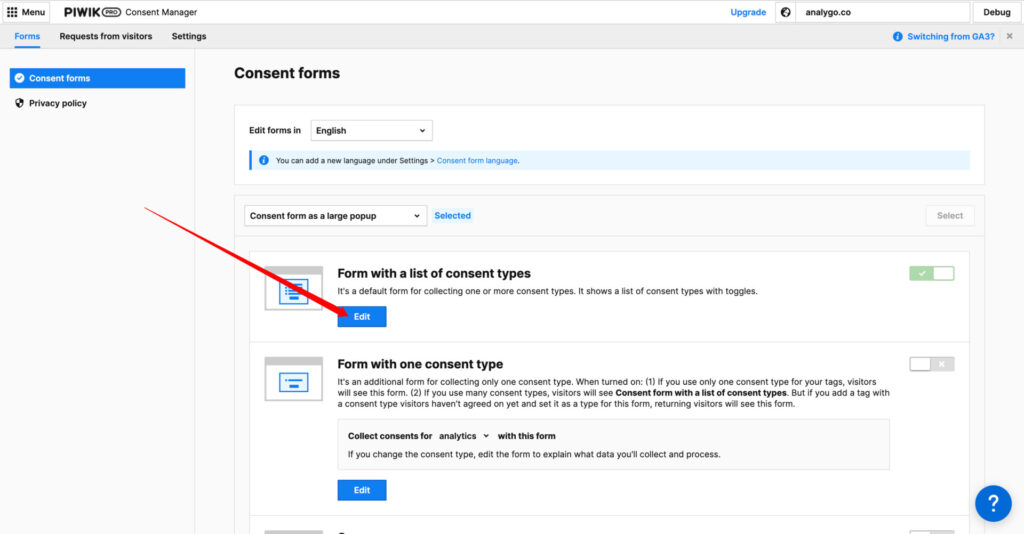
Section titled “Customize your pop-up”1. Add Privacy policy page
Section titled “1. Add Privacy policy page”Having a policy page is essential. To link your pop-up to a policy page, go to Consent manager > Consent forms > Edit.
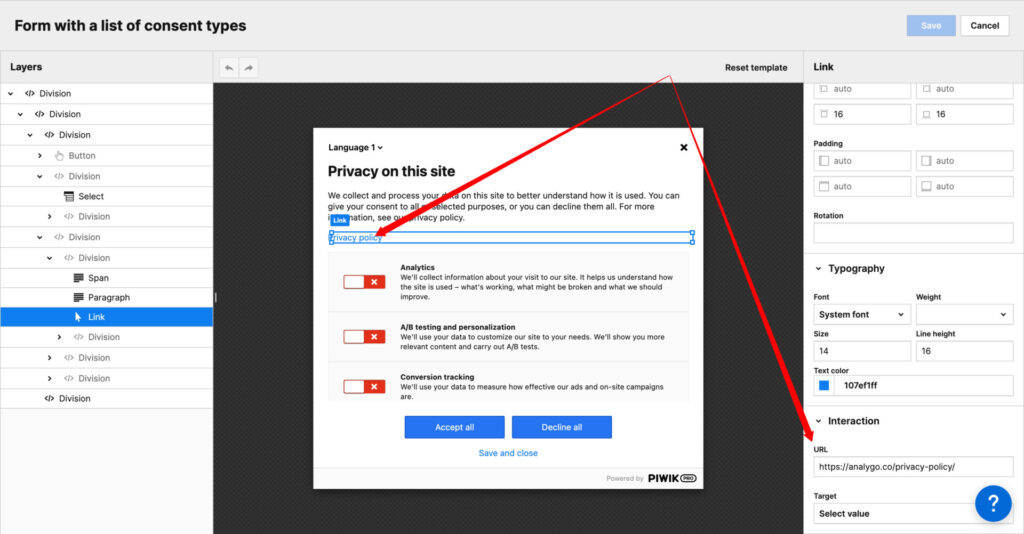
Add a Link to your privacy policy text
Click on save and debug setup
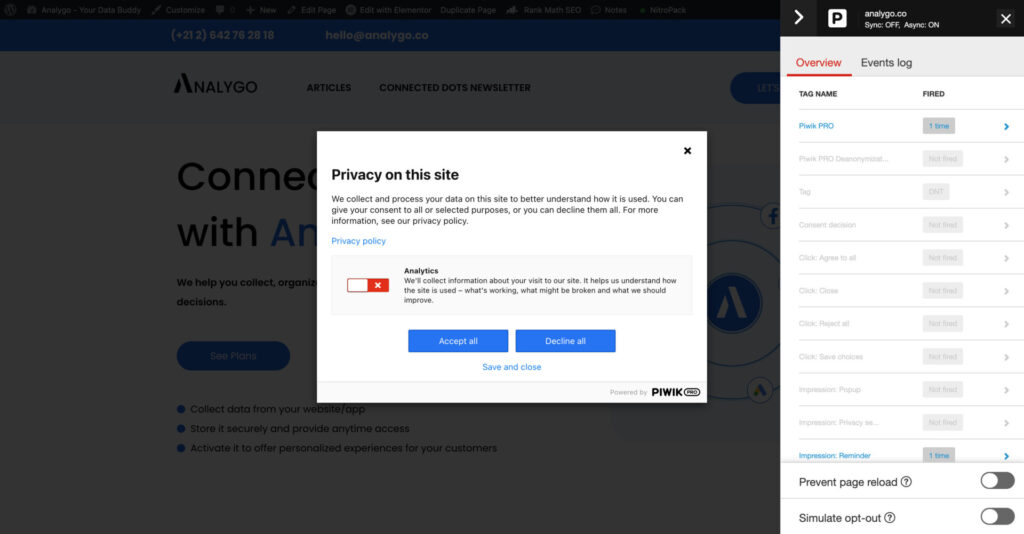
Everything is working as expected. Next we will test a tag that sends clicks information to Piwik pro to see if it’s executing according to users consent choices.
2. Configure consent settings
Section titled “2. Configure consent settings”If you want to display your cookie banner only in certain regions like EU for example, you can do this via the consent section.

Access Consent settings in Piwik Pro
Go to Menu > Personal administration > Your Website > Privacy > Consent Settings.
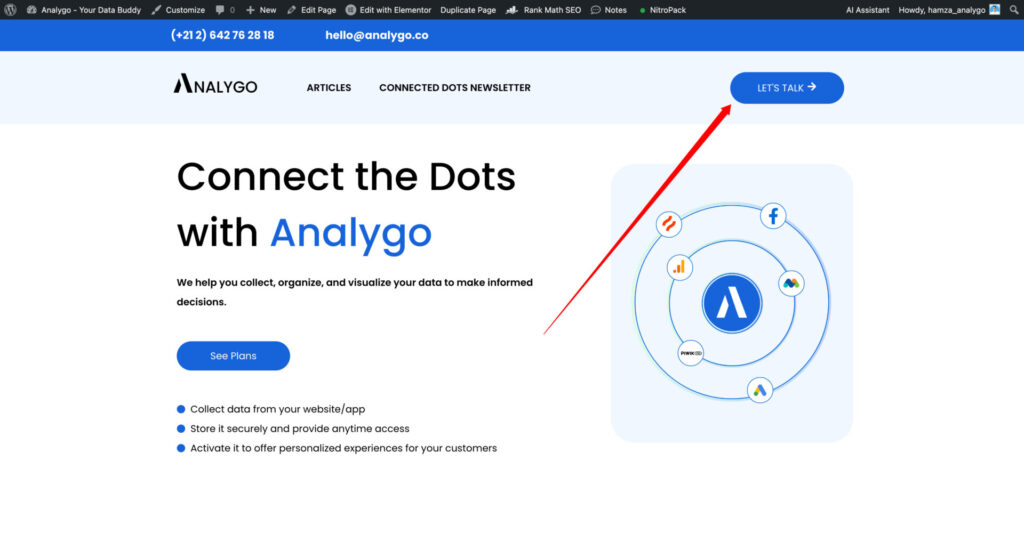
3. Test Consent manager setup
Section titled “3. Test Consent manager setup”We have the following tag, that sends an event each time the user clicks on “Lets Talk”.
Let’s see what happens when we deny tracking.
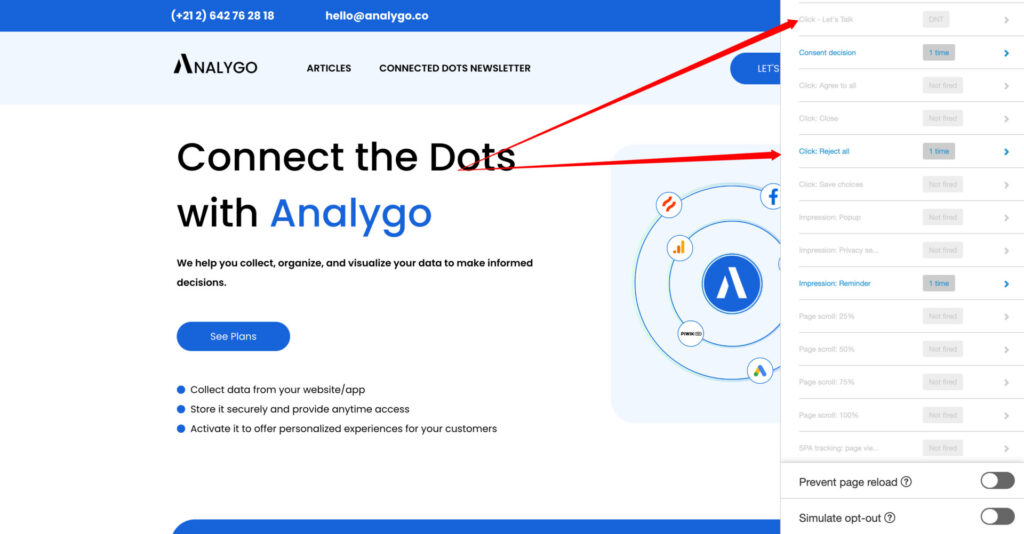
As you can see the tag “Let’s Talk” is not firing because opted out of tracking.
Final words on Piwik pro Consent Manager
Section titled “Final words on Piwik pro Consent Manager”Overall, Piwik consent manager offers a decent solution to manage users privacy choices. The tool can be very convenient if you don’t need to implement Consent mode v2 (you don’t use Google Ads).
On the other hand, you are probably better off with another CMP if you need to use Google Ads which requires consent mode. If you need to know more about this topic, you can check out our free guide below.
[elementor-template id=“976”]